RC Plane Flying Basics: A 10-Step Beginner’s Guide
by Motion RC June 1 2026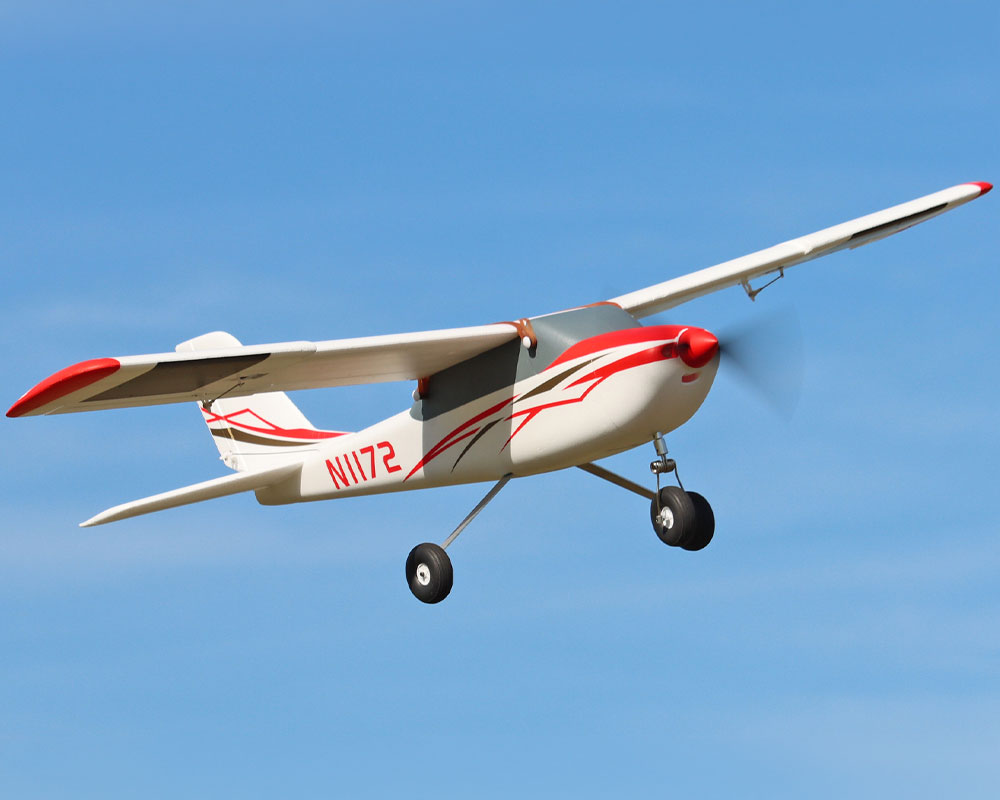
Flying your first RC plane is one of those moments you never really forget. Your hands feel slightly shaky on the transmitter, your brain suddenly forgets half the things you practiced, and the aircraft sitting on the runway somehow looks both tiny and terrifying at the same time. Then the throttle goes up, the wheels leave the ground, and within seconds your RC plane is zooming through the sky under your control. It is equal parts excitement, concentration, and pure adrenaline.
But learning how to pilot an RC plane takes a lot of patience and proper guidance. Behind every smooth first flight is a little preparation and a basic understanding of controls. But beyond that, you need a beginner-friendly aircraft that helps you learn everything with ease and total control. Without proper preparation, even a tiny mistake can turn a beautiful new plane into a foam puzzle scattered across a field.
This guide is designed for complete beginners who want to learn the fundamentals of RC flying properly and safely. Even if you’ve just bought your first trainer aircraft or are still deciding where to begin, these ten simple steps will walk you through everything from choosing the right plane to making your first smooth landing.
By the end of this guide, you will understand how to choose the right beginner RC plane, what each transmitter control actually does, why flight simulators are considered one of the smartest ways to learn, how to perform proper pre-flight safety checks, and the correct techniques for takeoff, flying, turning, and landing. You will also learn about the most common beginner mistakes in rc flying and how to avoid the kind of crashes that often happen during early flights.
Let’s taxi onto the runway right away!
Step 1: Choose the Right RC Plane for Your Skill Level
One of the first and biggest mistakes aspiring RC pilots make is buying an aircraft that looks exciting rather than one designed for learning. Fast jets, warbirds, and advanced aerobatic planes may look exciting, but they are built for experienced pilots who already understand orientation, throttle management, and recovery techniques. These aircraft react quickly to control inputs and leave very little room for mistakes, which is why they are not recommended for first-time flyers. Here’s how you can get started:
Why High-Wing Trainers Work Best
For beginners, high-wing trainer aircraft are the safest and most practical option. As the wing is mounted above the fuselage, the RC plane naturally stabilizes itself in the air and tends to return to level flight after turns. This gives beginners more time to react and correct mistakes without immediately losing control.
Trainer planes also fly at slower speeds and respond more gently to stick movements, making the learning process far less stressful. Many beginner trainers are built using durable foam materials that can survive minor bumps and rough landings, which is extremely useful during the early learning stage.
RTF vs PNP vs Kit
Beginners are usually encouraged to start with an RTF (Ready to Fly) aircraft because it includes nearly everything needed to begin flying. This pack includes the plane, transmitter, battery and charger. PNP (Plug and Play) models require additional electronics such as a receiver and transmitter, while kit versions often require full assembly and setup. For someone completely new to RC flying, RTF models remove much of the technical complexity and allow more focus on actually learning how to fly.
Recommended Wingspan
We recommend starting with an RC plan with a wingspan that spans between 800 mm and 1300 mm for beginners. Smaller planes can become unstable in windy conditions and are harder to see clearly at a distance, while very large aircraft may feel intimidating and difficult to transport. Medium-sized trainer planes provide a comfortable balance of stability, visibility, and smoother flight performance, making them perfect for building confidence during those first flights.
Step 2: Understand Your Transmitter Controls
Before flying your RC plane for the first time, it is important to understand what each transmitter control does. Many beginner crashes happen because the pilot becomes confused about control inputs, especially once the aircraft is flying toward them.
Most ready-to-fly RC aircraft use a Mode 2 transmitter layout, which places throttle and rudder on the left stick, with elevator and ailerons on the right stick. The examples below focus on this common Mode 2 layout.
Before flying, always confirm that your transmitter is set up as shown in the aircraft manual, and make sure any instructor, buddy-box system, or simulator uses the same control layout.
Left Stick Controls (Mode 2)
The left stick mainly controls throttle and rudder. Moving the stick up and down controls the throttle, which manages the motor speed and overall power of the aircraft. More throttle increases speed and climbing power, while reducing throttle slows the plane and allows it to descend gradually. Moving the left stick left and right controls the rudder. On the ground, this is typically used for steering through the nose wheel or tail wheel. In the air, the rudder helps direct the nose left or right, especially during takeoff, landing, and turns.
Right Stick Controls (Mode 2)
The right stick controls the elevator and ailerons. Moving the stick up or down controls the elevator, which changes the pitch of the aircraft. Pulling back raises the nose, while pushing forward lowers it. Left and right movements control the ailerons, which roll the aircraft and allow it to bank left or right during turns.
Small Inputs Matter
One of the most important lessons in RC flying is learning to stay smooth. Beginners often move the sticks too aggressively, which causes over-control of the aircraft which can result in sudden, unexpected turns and loss of control. Small, gentle stick movements produce far smoother and safer flights.
Step 3: Use a Flight Simulator Before You Fly
There is a popular saying that “mistakes are the best way to learn,” and that is absolutely true in RC flying as well. The only difference is that learning from mistakes with a real RC plane can become very expensive very quickly. That is precisely why flight simulators are considered one of the smartest starting points for beginners. They allow new pilots to make mistakes, lose control, crash, restart, and try again without damaging an actual aircraft. Simulators also help reduce nervousness before the first real flight by making the controls feel far more familiar and natural. Here’s why simulator practice is so helpful before your first real flight:
Why Simulators Work
Flight simulators are extremely effective because they build muscle memory and improve reaction time. Beginners learn how to control orientation, manage throttle smoothly, perform gentle turns and line up proper landing approaches. One of the hardest parts of RC flying is handling the aircraft when it starts flying toward you, since the controls appear visually reversed. Regular simulator practice trains your brain to react correctly without panicking.
Recommended RC Flight Simulators
Popular beginner-friendly simulators include RealFlight Evolution, Phoenix RC and AeroFly RC. Even mobile RC flight simulator apps can help beginners practice basic control techniques before flying a real aircraft.
How Long Should You Practice?
Most beginners should spend at least 8 to 15 hours practicing on a simulator before their first real flight. Learning takeoffs, figure-eight patterns and smooth landings in a virtual environment can dramatically reduce crashes and build confidence much faster.
Step 4: Assemble and Inspect Your Plane
A surprising number of RC crashes happen before the aircraft even leaves the ground. In many cases, the problem is not poor flying skills but a setup mistake that could have been caught during inspection. Even Ready to Fly aircraft require proper assembly checks before every flight. Rushing through the setup process may save a few minutes initially, but it can easily end with a damaged aircraft moments after takeoff. Taking time to inspect your plane carefully is one of the most important habits in safe RC flying. Here are the key setup and inspection points to check before flying:
Follow the Manual Carefully
Manufacturers include setup instructions for a reason, and beginners should never skip them. Pay close attention to servo installation, wing attachment, linkage setup, propeller orientation, and battery placement. Even a small assembly error can affect how the aircraft behaves in the air. Many trainer aircraft are designed for quick assembly, but that does not mean they should be assembled carelessly.
Check the Center of Gravity (CG)
The center of gravity, usually called CG, is the balance point of the aircraft. It is one of the most important setup items to check before flying because it directly affects how stable the plane will be in the air. A nose-heavy aircraft may feel sluggish, require extra up elevator, and struggle to climb efficiently. A tail-heavy aircraft is much more serious because it can become overly sensitive, unstable, and difficult to recover. This is why modelers often say, “A nose-heavy airplane may fly poorly, but a tail-heavy airplane will only fly once.”
Manufacturers provide a recommended CG range in the manual, usually measured back from the leading edge of the wing near the fuselage. With the flight battery installed, support the aircraft at the recommended balance points using your fingertips or a CG stand. The plane should sit level or slightly nose-down. If it balances too far forward or too far back, adjust the battery position or add weight as recommended before flying.
Control Surface Direction Check
Before every flight, confirm that all control surfaces move in the correct direction. Pulling back on the elevator stick should move the elevator trailing edge up. Moving the rudder stick to the right should move the rudder trailing edge to the right. Moving the aileron stick to the right should move the right aileron trailing edge up and the left aileron trailing edge down. Incorrect control direction can cause an immediate crash after takeoff, so this is one of the most important pre-flight checks you can perform.
Additional Inspection Checklist
Before heading to the runway, inspect the aircraft carefully for loose components or visible damage. Make sure the propeller is secure, the battery is firmly mounted, the wings are locked properly, and the landing gear is stable. Also check for foam cracks, loose servo arms, or damaged linkages. A quick inspection only takes a few minutes but can prevent major problems once the aircraft is airborne.
Step 5: Charge Your Battery Correctly
Most modern RC aircraft use LiPo batteries because they are lightweight, powerful, and capable of delivering the high performance needed for smooth RC flying. However, LiPo batteries also require proper handling and charging practices. When used correctly, they are very safe and reliable, but careless charging habits can lead to battery damage or even fire risks. Learning how to charge and store your batteries properly is just as important as learning how to fly the aircraft itself. Here’s how you can keep your RC plane battery healthy:
Always Use a Balance Charger
A balance charger is designed specifically for LiPo batteries and monitors each cell individually during charging. This helps maintain equal voltage across all cells and prevents overcharging, which can damage the battery permanently. Beginners should avoid using cheap or incorrect chargers that are not built for LiPo batteries. Many modern balance chargers also include useful features such as storage mode, cell monitoring, and automatic safety cutoffs.
Never Leave Charging Batteries Unattended
One of the oldest and most repeated rules in RC flying is to never leave LiPo batteries charging unattended. Batteries should always be charged on a non-flammable surface and preferably inside a LiPo safety bag. Keep them away from paper, curtains, wooden surfaces, or direct heat sources. While serious battery incidents are uncommon when handled correctly, basic safety precautions are critical.
Never Charge Damaged Batteries
If a battery becomes swollen, puffy, physically damaged, or unusually hot during charging or flying, stop using it immediately. Damaged LiPo batteries can become unstable and should never be charged again. Dispose of them safely according to local battery disposal regulations instead of throwing them into normal household waste.
Storage Voltage Matters
LiPo batteries should not remain fully charged for long periods when not in use. Most experienced RC pilots store their batteries at approximately 3.8 volts per cell, which helps maintain battery lifespan and performance. Many modern chargers include a storage mode that automatically adjusts the battery to the correct voltage level for safe long-term storage.
Check Battery Health Before Flying
Before every flight, inspect the battery carefully for connector damage, swelling, loose wires or cell imbalance. A weak or damaged battery can cause sudden power loss during flight, which may lead to crashes or loss of control. Taking a few minutes to check battery health before flying can prevent major problems once the aircraft is in the air.
Step 6: Find a Safe Place to Fly
Now that we’ve covered almost all the ground-basics, we can start flying. But the next big step is in choosing the best possible location for RC flying. Even the best beginner aircraft can become difficult to control if the flying area is too small, crowded, or filled with obstacles. New pilots need plenty of open space because early flights often involve wide turns, uneven landings, and occasional overcorrections. A large flying area gives beginners more time to react calmly and recover from mistakes before the aircraft gets too close to trees, buildings or people. Find the safe spot for RC flying with the following instructions:
Ideal Flying Locations
The best places for beginner RC flying are large open fields with very few obstacles nearby. Look for areas with short grass, minimal pedestrian traffic, and plenty of clear airspace free from power lines or busy roads. Dedicated RC flying fields are the best choices for RC aircraft. Beginners should avoid small public parks surrounded by trees and buildings because they quickly become difficult to navigate once the aircraft gains altitude or starts drifting in the wind.
Flying Clubs and Registered Sites
Joining a local RC flying club is strongly recommended for beginners. A club gives new pilots access to a safer flying environment, experienced instructors, and practical guidance that is difficult to get when learning alone. Many clubs also offer buddy-box training systems, flight instruction, setup help, repair advice, and safety guidance to help beginners learn faster and avoid common mistakes.
In the US, many pilots fly through clubs chartered by the Academy of Model Aeronautics (AMA). In the UK, many pilots fly through clubs affiliated with the British Model Flying Association (BMFA). Both organizations can be helpful resources for finding local clubs, understanding model aviation safety guidance, and connecting with experienced pilots.
Outside the US and UK, beginners should check with their local model flying association, national aviation authority, or nearby RC club to find suitable flying sites and understand local requirements. Field rules, aircraft restrictions, noise limits, and flying hours can vary, so always confirm the local requirements before flying.
Stay Away From Airports!
RC aircraft should never be flown near airports or restricted airspace without proper authorization. As a general safety rule, beginners should avoid flying within 5 kilometers of any airport and always check local airspace regulations before heading to the field. This is important not only for legal reasons but also for overall aviation safety.
Wind Conditions for Beginners
Calm weather makes learning significantly easier. Beginners should ideally fly in wind conditions below 10 mph, especially during early morning or evening hours when the air is usually smoother and more stable. Strong winds can make trainer aircraft difficult to control and dramatically increase landing difficulty, even for experienced pilots.
Step 7: Do a Pre-Flight and Range Check
One of the reasons experienced pilots rely heavily on checklists is because excitement can make people forget even simple things. The same applies to rc flying. Many beginner crashes happen not because of any aircraft failures but because pilots skip the pre-flight check in the rush to get airborne. Taking a few extra minutes before every flight can prevent signal issues, incorrect control movement, and accidental throttle activation. Developing a proper pre-flight routine early on is one of the smartest habits any RC pilot can learn. The following are the important things to consider in this step:
Correct Startup Sequence
Always switch the transmitter on first before connecting the aircraft battery. This allows the receiver to establish a proper signal connection with the transmitter immediately after power is supplied to the aircraft. Once the flight is finished, follow the reverse order by disconnecting the aircraft battery first and then turning the transmitter off. This simple sequence helps prevent accidental motor activation and reduces the chances of unexpected throttle movement while handling the aircraft on the ground.
Perform a Range Check
Modern 2.4GHz radio systems usually include built-in range testing features that help verify signal strength before takeoff. Follow the manufacturer’s instructions carefully and perform the test exactly as recommended. The purpose of a range check is to confirm that the aircraft responds correctly at a safe distance without losing signal or experiencing interference. Skipping this step can lead to complete loss of control once the aircraft moves farther away in the air.
Confirm Control Response
Before every takeoff, walk a short distance away from the aircraft and confirm that all control surfaces respond correctly. Check the elevator, rudder, ailerons, and throttle carefully while watching for smooth and accurate movement. Even a loose servo wire or incorrectly connected control linkage can cause immediate problems after takeoff. A proper control response check only takes a minute but can easily save an aircraft from a preventable crash.
Step 8: Take Off Smoothly
Ready to get to the real thing? Takeoff is one of the most exciting moments in RC flying. But it is also where many beginners become too aggressive with the controls. New pilots often apply too much throttle too quickly or pull the aircraft upward before it has gained enough speed. In reality, a good takeoff should look smooth, calm, and controlled rather than fast or dramatic. The goal is simply to get the aircraft safely into stable flight while maintaining full control from the moment it leaves the ground. A smooth takeoff comes down to a few simple habits:
Always Take Off Into the Wind
Whenever possible, beginners should always take off directly into the wind. A headwind helps the wings generate lift more efficiently and reduces the amount of runway distance needed for takeoff. This makes the aircraft feel more stable during liftoff and gives pilots extra time to react. Crosswind takeoffs are much harder for beginners because the aircraft may drift sideways or require constant correction immediately after leaving the ground.
Gradually Increase Throttle
One common beginner mistake is instantly pushing the throttle to maximum power. Instead, increase the throttle smoothly and steadily while keeping the aircraft moving straight along the runway or grass surface. Gentle rudder corrections can help maintain direction if the plane starts drifting slightly left or right during acceleration. Smooth throttle application gives the aircraft time to build stable airflow over the wings before takeoff.
Rotate Gently
Once the aircraft reaches enough speed, gently pull back on the elevator to lift the nose slightly. The plane should rise naturally into the air rather than being forced upward aggressively. Pulling too hard on the elevator too early can cause the aircraft to stall immediately after takeoff, which is one of the most common beginner crash situations in RC flying.
Climb Before Turning
After the aircraft leaves the ground, focus first on climbing to a safe altitude before attempting any turns. Maintain steady throttle and keep the aircraft flying straight until it feels stable and comfortable in the air. Beginners sometimes try turning immediately after takeoff, but low-altitude turns leave very little room for recovery if something goes wrong. Climbing first gives you valuable reaction time and makes the aircraft much easier to control during those critical first few seconds of flight.
Step 9: Fly Basic Maneuvers and Build Confidence
Once your aircraft is safely in the air, the next goal in RC flying is not performing aerobatics or flying aggressively. Early flights should focus entirely on building control, consistency and confidence. Many beginners become tempted to try sharp turns or advanced maneuvers too quickly, but learning smooth basic flying skills first creates a much stronger foundation for everything that comes later. The more calmly and predictably you fly, the easier the aircraft becomes to manage in different situations. Here’s how you can master the basics:
Master Straight and Level Flight
One of the first skills every beginner should practice is straight and level flight. This teaches proper throttle management, smooth control corrections and orientation awareness while keeping the aircraft stable in the air. Instead of constantly moving the sticks, focus on making small adjustments only when necessary. Stable flight may look simple from the ground, but it is actually one of the most important skills in RC flying because every maneuver begins and ends with controlled level flight.
Practice Gentle Turns
After becoming comfortable with straight flight, begin practicing gentle left and right turns using small aileron inputs. Avoid steep banking angles or sudden stick movements during early flights. Smooth turns help beginners understand how the aircraft responds while maintaining altitude and balance. Gradual turns are easier to recover from and give new pilots more time to react if the aircraft begins drifting or descending unexpectedly.
Learn the Figure Eight
The figure-eight pattern is considered one of the best beginner training exercises in RC flying. Flying repeated figure-eight patterns helps develop coordinated turning, direction changes, orientation awareness, and proper circuit control. It also teaches pilots how to transition smoothly between left and right turns while maintaining stable altitude throughout the maneuver.
Fly “Two Mistakes High”
Experienced pilots often advise beginners to stay “two mistakes high”. This simply means maintaining enough altitude to recover safely if something goes wrong. Higher altitude gives pilots valuable reaction time and space to correct mistakes before the aircraft reaches the ground. Beginners who fly too low often panic more quickly because they have very little time to recover from sudden problems or incorrect inputs.
The Reverse Controls Problem
Every beginner eventually experiences the confusing moment when the aircraft starts flying toward them and the controls suddenly appear reversed. When the plane faces toward you, moving the stick left makes the aircraft appear to move right from your perspective. The easiest correction method is to move the stick toward the lower wing. With regular practice, your brain gradually adapts and these orientation changes start feeling natural.
If Things Go Wrong
If the aircraft becomes unstable or difficult to control, one of the smartest things a beginner can do is reduce or cut the throttle. A powerless aircraft usually hits the ground with far less force than one crashing at full speed. Staying calm and reducing throttle often minimizes damage and gives you a better chance of recovering control before impact.
Step 10: Land Safely
Landing is often the part of RC flying that beginners fear the most, but in reality, a good landing is simply a controlled and well-planned descent. Many new pilots panic during approach and either bring the aircraft in far too fast or cut the throttle too early, causing the plane to drop suddenly. Smooth landings come from patience, gentle control inputs, and proper positioning rather than trying to force the aircraft onto the ground quickly. Like every other skill in RC flying, landing becomes far easier with regular practice and calm decision-making. Land perfectly by:
Reduce Throttle Gradually
One of the most common beginner mistakes is suddenly shutting off the motor high above the runway or landing area. Instead, reduce the throttle slowly and allow the aircraft to descend naturally while maintaining steady glide speed. Keeping a little power during the approach helps the plane remain stable and gives you better control over altitude and direction. Abrupt throttle cuts can cause the aircraft to lose lift too quickly and result in hard landings.
Use a Proper Landing Circuit
A proper landing circuit helps beginners stay organized during approach instead of rushing toward the runway at the last moment. Most standard landing patterns include an upwind leg, crosswind leg, downwind leg, and final approach. Following this pattern gives pilots enough time to line up correctly with the runway and make smooth adjustments before touchdown. Consistent landing circuits also improve orientation and help develop better flying habits overall.
Keep the Approach Shallow
Beginners should avoid steep landing approaches whenever possible. Steep descents increase speed and reduce reaction time, making the aircraft harder to control close to the ground. A shallow and steady approach allows smoother corrections and creates a far more predictable landing. Gentle control inputs are especially important during the final few seconds before touchdown.
Land Into the Wind
Just like takeoffs, landings should ideally be performed into the wind. A headwind reduces the aircraft’s ground speed and improves overall stability during touchdown. This gives beginners more control and helps create softer, smoother landings with less bouncing or drifting after the wheels touch the ground.
Shutdown Procedure
After landing safely, always disconnect the aircraft battery first and then switch off the transmitter. Following the correct shutdown sequence helps prevent accidental throttle activation while handling the aircraft on the ground. Developing these small safety habits early makes RC flying much safer and more organized over time.
Bonus: Post-Flight Checks and Storage
Good habits after flying are just as important as preparation before takeoff. Many experienced pilots inspect their aircraft carefully after every session because small problems caught early can prevent major failures during future flights. A quick post-flight routine also helps extend the lifespan of both the aircraft and its electronics, making your overall RC flying experience safer and more reliable. Here are the things to check:
Post-Flight Checklist
After landing, inspect the aircraft for foam cracks, loose screws, damaged propellers, bent landing gear or servo issues. Even small bumps during landing can loosen components or create hidden damage that may become dangerous during the next flight.
Store LiPo Batteries Correctly
If you are not planning to fly again soon, place your LiPo batteries in storage mode using a balance charger. Batteries should always be kept in a cool, dry place away from direct sunlight or heat sources to maintain performance and lifespan.
Protect Your Aircraft
Avoid leaving RC planes inside hot cars, damp rooms or under direct sunlight for long periods. Excessive heat can warp foam airframes and damage sensitive electronics over time.
Log Your Flight Time
Many RC pilots keep track of flight duration, battery cycles, repairs and aircraft performance. This helps identify aging batteries and maintenance issues before they become serious problems during flight.
FAQ
How long does it take to learn to fly an RC plane?
With a simulator and a beginner trainer aircraft, most people become comfortable with basic flying within 5 to 10 flying sessions. True confidence usually takes weeks to several months of regular practice.
What is Mode 2 on a transmitter?
Mode 2 is the most common transmitter layout used with many ready-to-fly RC aircraft. In Mode 2, the left stick controls throttle and rudder, while the right stick controls elevator and ailerons. Before flying, always confirm that your transmitter layout matches the aircraft manual, simulator, or instructor setup you plan to use.
What does Center of Gravity (CG) mean?
CG is the aircraft’s balance point and one of the most important setup checks before flying. A nose-heavy aircraft may feel sluggish, require extra up elevator, and be less efficient in flight. A tail-heavy aircraft is more serious because it can become overly sensitive, unstable, and difficult to recover. Always set the CG within the range recommended in the aircraft manual before flying.
Why do the controls seem reversed when the plane flies toward me?
This is because the aircraft’s orientation changes relative to you. The simplest correction is to move the stick toward the lower wing. With practice, the motion becomes automatic.
Do I need to join a flying club?
Not necessarily, but it is something we highly recommended. Clubs provide instructors, safer flying locations and buddy-box systems that help beginners learn faster and more safely.
What is a buddy box system?
A buddy box links your transmitter to an instructor’s transmitter. The instructor can instantly take control if necessary, making it one of the safest beginner training methods.
How do I know when my battery is running low?
Most ESC systems include low-voltage cutoff protection that reduces power when voltage drops too low. Pilots should also use timers and avoid draining batteries below roughly 20% capacity.
From Takeoff to Landing: The Ultimate Beginner’s Guide to RC Plane Flying
Learning RC flying is about building confidence one flight at a time. It is about understanding that every smooth landing begins with a few shaky takeoffs first. From choosing the right beginner-friendly trainer aircraft and understanding your transmitter controls to practicing on simulators, performing pre-flight checks, managing batteries safely, and mastering smooth takeoffs and landings, each of these ten steps plays a major role in helping new pilots become safer and more confident in the air.
The beauty of RC flying is that every session teaches you something new. Some days you will nail the perfect landing, while other days your aircraft may decide to inspect the ground a little too closely. That is completely normal. Even the most experienced RC pilots have crashed aircraft, repaired broken foam, replaced propellers, and gone right back into the air again. Patience, consistency, and practice are what truly build skill in this hobby.
As your confidence grows, you can gradually move from basic trainer aircraft to faster sport planes, advanced aerobatic models, and even high-performance EDF jets. The learning journey itself is part of what makes RC aviation so addictive and rewarding.
For beginners looking to start with reliable trainer aircraft, quality electronics, and trusted RC accessories, explore the beginner RC plane collection available at Motion RC. Begin your RC flying adventure with complete confidence and the perfect RC machines right away!

Trending Items


RotorScale MD-500D Magnum PI Super Scale 470 Size GPS Stabilized Helicopter - RTF
SKU: RSM-470-R-MD-MG


RotorScale UH-1 Huey “114th AHC” 150 Size Gyro Stabilized Helicopter - RTF
SKU: RSH1024-001


RotorScale UH-1Y Venom 220 Size GPS Stabilized Helicopter – RTF
SKU: RSH1023-001


Freewing A-10 Thunderbolt II V3 Twin 64mm High Performance EDF Jet - PNP
SKU: FJ11711P
New Arrivals


Team Corally Furago XD Blue Small Scale 4WD Monster Truck - RTR
SKU: COR00230-B


Team Corally Furago XD Green Small Scale 4WD Monster Truck - RTR
SKU: COR00230-G


Team Corally Furago XD Orange Small Scale 4WD Monster Truck - RTR
SKU: COR00230-O


Coolbank US M8 Scott Camo 1/16 Scale Motorized Howitzer - RTR
SKU: CBKG2079-002